



Showing posts with label weekday potluck. Show all posts

Tuesday, November 6, 2012

Recipe | Singkamas at Sitaw Dinengdeng

Comments
It's quite sometime since I last shared a recipe, so for today let me share something healthy and comforting.

As a daughter of an Ilocano man, I grew up eating Dinengdeng, which is simply boiled vegetable soup seasoned with fried or grilled fish and bagoong. There are so many mix of vegetables for this dish, but personally, my favorite vegetables for this dish include - bamboo shoots, malunggay fruit, squash flowers, and jicama fruit, which is the star of this Dinengdeng dish I am about to share.

Typically, whenever I share recipes, I'd list the ingredients and how the dish is cooked, but for today, I will share a step-by-step guide.
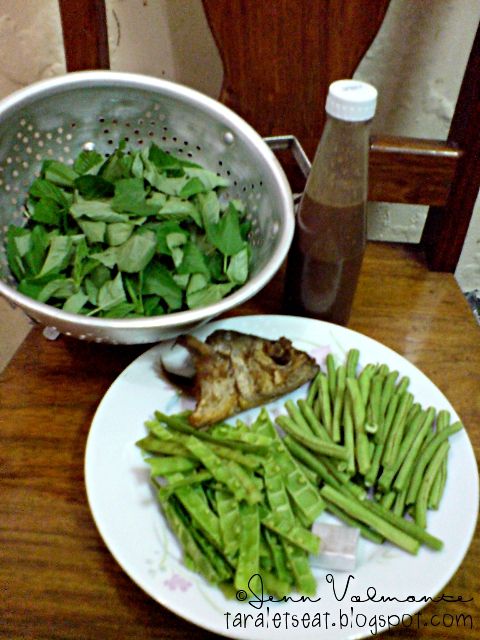

Prepare the ingredients. For this dish, I used jicama fruit (singkamas) - split in half, string beans, saluyot leaves (jute), fried fish, and tamarind cube.

This recipe actually calls for fresh tamarind or fresh kamias (bilimbi) to give the sour flavor to the broth, but because the nearby market didn't have tamarind and our bilimbi tree doesn't have fruits yet, I just made use of the tamarind cube we have. The sour agent isn't always present in many Dinengdeng dishes, but some dishes with jicama fruit have it.

As for the fish, you can use (like I say) fried or grilled fish, and you can add as much as you want. In our household, us siblings prefer "dry" fish and mom prefers her fish "wet," so we only add one piece of fish for mom. You can also use leftover fish or cook a fresh one, like we did for this dish.
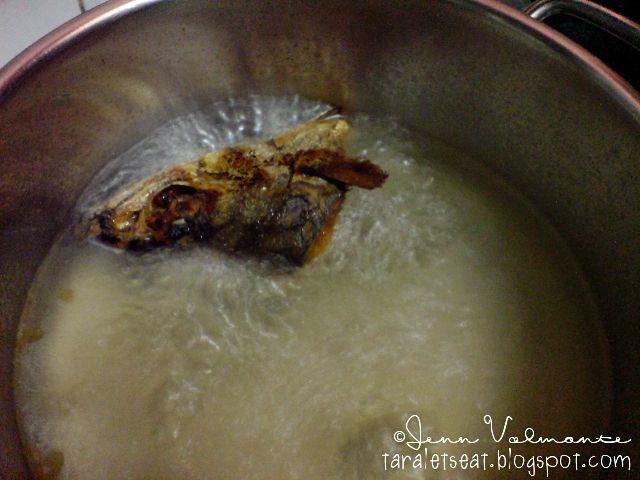

#1. Fill up a pot with water depending on the amount of vegetables you're cooking. Some cooks save up the water they used in cleaning rice before cooking it, but I wasn't able to ask brother to save the rice washing (as they call it), so I just used regular water.

Allow the water to boil and add in bagoong. There is no specific amount of bagoong to put, so you have to go with gut-feel. I added about three tablespoons of bagoong for this one. If what you have at home isn't the boneless kind and you can see pieces of anchovies in the bottle, scoop out some bagoong in a small bowl and add boiling water (from the pot) and crush the anchovies. Pour the water back to the pot, making sure you strained in the process (you didn't want to have some anchovy bones in your dish). Boil for a few more minutes.
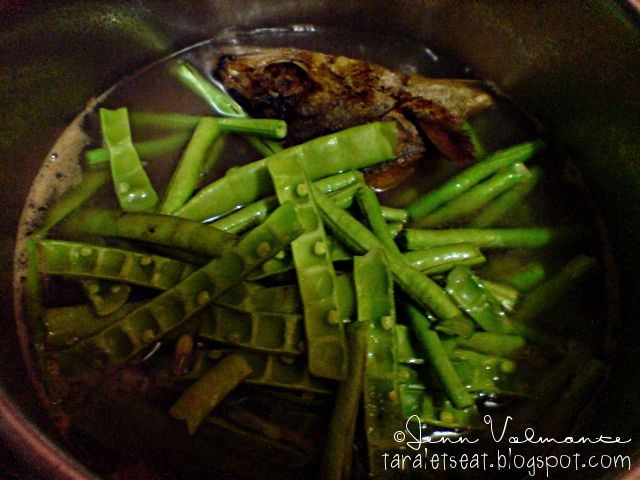

#2. Add the jicama fruits and sitaw and stir lightly.

As the broth boils, you will see some bubbles and oil floating, just scoop it out. Cover the pot. When the vegetables are half-cooked, drop half of the tamarind cube.

If you're using fresh tamarind or kamias, boil them at the start of your cooking, but take out the sour fruit before adding the vegetables. At this point (if you use fresh sour fruits), do what you did to the bagoong - add broth and crush the fruits and pour back the broth to the pot (making sure you strained it as well).
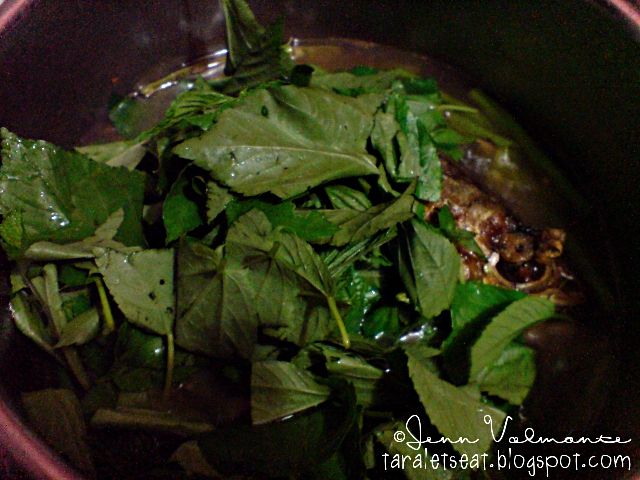

#3. Add the saluyot leaves and stir.

If you're going to serve this right away, simmer the dish for three minutes and serve it. If you're not going to serve it right away, then turn off the heat at this point, cover the pot and allow the residual heat to cook the leaves.
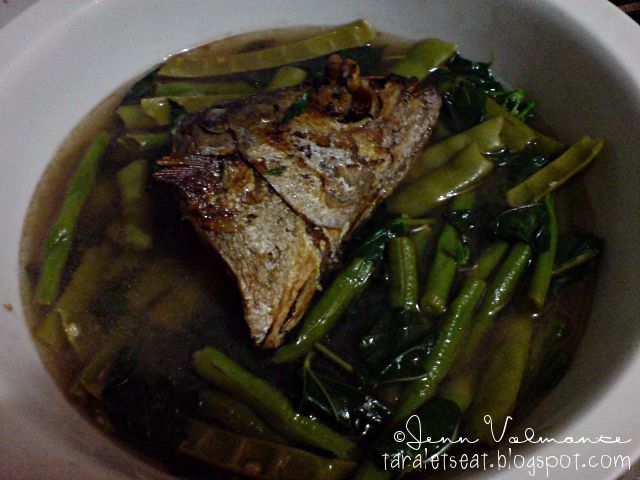

I don't know what other vegetables one can use for this particular dish, but here at home, these are the usual combinations.



Tuesday, January 24, 2012

Mung Bean Sprouts, Tofu, and Tomatoes

Comments


Second of the four recipes from Ms. Maiylah I wanted to try:

Mung Bean Sprouts, Tofu, and Tomatoes

Mung Bean Sprouts, Tofu, and Tomatoes
{Serves: 2}

Ingredients:
  • 1 cup mung Bean Sprouts
  • 1 block firm tofu
  • 2 tablespoons soy sauce
  • a dash of pepper and paprika
  • 1 small onion, sliced
  • 3 cloves of garlic, chopped
  • oil for sauteeing / frying
  • salt and pepper (to taste)
  • a few drops of sesame oil
  • sesame seeds for garnish

How to Cook:

  • Slice tofu and marinate in soy sauce, pepper, and paprika. Set aside.
  • Heat oil and fry the tofu until cooked. Place on a plate lined with paper towels to drain excess oil. Cut into bite size pieces after it has cooled down.
  • Heat about a tablespoon oil in another pan and saute onions and garlic. Add tomatoes slightly after.
  • After about two minutes, add the mung bean sprouts and continue to stir fry. Mung bean sprouts will render some liquid, but you may add a little water if you want to. Add the tofu pieces and mix.
  • Correct the seasoning according to your preference.
  • Drizzle a few drops of sesame oil, mix, then turn off the heat. Plate and serve.

Frying the tofu was a bit difficult for me, but after that little disaster with the first piece, I was able to finally get it done by adding more oil, making sure the tofu didn't touch the base of the pan.

I loved how it tasted. It reminded me of Kongnamul Bibimbap (minus the tomatoes), and it sure can be a full meal as is, but it can be a great side dish for any fried or grilled meat and seafood. Oh... just take it easy on the soy sauce marinade; tofu tends to absorb the liquid, so be sure you don't go over with this, or you'll end up with salty fried tofu.

To check Ms. Maiylah's original post about this recipe, please click HERE. Big thanks to you, Ms. Maiylah for giving your readers very easy recipes to follow.


Tuesday, January 17, 2012

Recipe | Mung Bean Sprouts with Shrimps and Cumin

Comments
I am a frequent player of Ms. Maiylah's "Food Friday" meme, and since most of the recipes she share are very easy to do, I told myself I'd cook four recipes from her site this week. Was able to try one recipe for Sunday's lunch - Toge with Cumin.

Reading the recipe, it reminded me of Okoy, and since we still have small shrimps in the freezer, I figured I'd add shrimps to it as well.

Mung Bean Fritters with Shrimps and Cumin

Mung Bean Sprouts with Shrimps and Cumin
{Makes about 5 patties}

Ingredients:
  • 1 1/2 cups Mung Bean Sprouts
  • 3/4 cup small shrimps
  • 1 large egg, beaten
  • 1/2 teaspoon cumin
  • 3 tablespoons milk
  • 3 tablespoons flour
  • salt and pepper (to taste)
  • cooking oil (for frying)

How to Cook:

  • Add milk into the bowl where you beat the egg. Then, add cumin, salt, and pepper and mix.
  • Add flour and mix - making sure the batter is not too watery nor too dense. If you're already satisfied with its consistency, you may then add the mung bean sprouts and shrimps.
  • Heat a pan with oil. Spoon out some mixture and spread it as big as a hamburger patty, and fry until golden brown. Place on a plate lined with paper towels to drain excess oil. Serve with your choice of dip.
Mung Bean Fritters with Shrimps and Cumin

I tried three kinds of vinegar as my dip - the Balsamic Vinegar tend to be sweet for my taste, the Pinoy Kurat was okay, but my choice for this dish would be the Sinamak vinegar as it wasn't too thick and too flavorful.

To test if your mixture had the right amount of seasoning, fry a very little mixture (I used three sprouts, one shrimp and a little batter) and taste after it was cooked. Adjust the seasoning if needed.

The typical Okoy recipe I know used water and a little rice flour. This was the first time I heard of cumin being used to this recipe and I loved how the milk and cumin added a new flavor to the dish. This is very flexible, and next time I'd add some moringa leaves, just for kicks. :)

If you want to get the exact recipe Ms. Maiylah posted, please check her blog post HERE. Thank you so much Ms. Maiylah for the inspiration.


ps - you might notice a different date stamps on the pictures; that's because we had a lot of mung bean sprouts, I decided to cook it for lunch today as well.


Tuesday, December 13, 2011

Recipe | Chicken Pasta in Chunky Tomato Sauce

Comments
Sister started working again, so it's rare for us to spend time together, and last Saturday (her day off at work), she asked if I could cook her a pasta dish. Well, she is one big pasta lover, so I decided to give in to her wishes, after all, she is my baby sister.

We haven't had the chance to do grocery shopping yet, and the only meat I could use for the pasta was the chicken breast. The only time I get to eat pasta with chicken is when I eat at KFC - whenever I cook pasta, I always go for the usual choice of protein: pork, beef, and tuna. I wasn't sure how the dish will turn out, but I still gave it a shot.

Chicken Pasta in Chunky Tomato Sauce

Chicken Pasta in Chunky Tomato Sauce
{serves 2 - 3}

Ingredients
  • 125g pasta, cooked per package directions
  • 150g boiled chicken breast (flaked), stock reserved
  • 1 pouch Clara Ole Chunky Tomato Sauce
  • 1 small onion, minced
  • 3 cloves garlic, minced
  • 1 medium sized carrot, minced
  • salt and pepper to taste
  • a dash of Italian Seasoning
  • 1 - 2 tablespoons Olive Oil (pure)
  • grated cheese (optional)

How to Cook:

  • Heat olive oil and saute onions and garlic. Just before the garlic turns light brown, add in the chicken and mix.
  • Add a little of the reserved stock (three tablespoons will be enough), then the tomato sauce. Let it simmer for a few minutes, then add in the carrots.
  • Add in a dash of Italian Seasoning followed by the salt and pepper. Simmer for about a minute then adjust the seasoning according to your preference.
  • Toss in the cooked pasta and serve.

I didn't add some grated cheese to my plate of pasta because I try to save myself from additional calories, but since the tomato sauce I used is three-cheese flavored, I still could taste a hint of cheese into it. My sister used cheese spread (Chiz Whiz) on her pasta to add some creaminess into it.

By the way, I cooked the chicken first - I added a pinch of salt and pepper as well as a minuscule amount of onion and garlic just so the chicken already had some flavor prior to cooking the sauce. I set aside a little of the stock for the sauce, while the remaining stock (strained) I used in cooking the pasta, with additional water and salt, of course.

Whenever I cook pasta, I save gas by turning off the heat halfway through the process (about 4 - 5 minutes after I added the pasta into the boiling water), and let the remaining heat cook the pasta. Of course, this is quite a risky move... I have to check the pot every once in a while just to stir the pasta and making sure I don't leave it too long. I am sure not everyone will agree to it, but I can get al dente pasta without using much gas, so I am okay with this.

Now that I've said goodbye to pork and I don't allow myself to eat much beef, using chicken for my pasta dishes is going to be something I might do a lot from now on.


Tuesday, December 6, 2011

Recipe | Sigarilyas Sarciado

Comments
When sister and I attended the 8th Philippine Food Expo in 2009, my sister was able to buy a Mama Sita cookbook ("Lutong Bahay"). All the recipes featured one or two Mama Sita products, but what made sister buy it is because the dishes were simple to do and it fits every Filipino's palate.

This week, I challenged myself not to eat pork and fried food, so finding dishes to eat can be a little difficult to do, but thanks to this recipe, I was able to find a great way to eat vegetables without having the need to use pork.

Sigarilyas Sarciado

Sigarilyas Sarciado
serves 4

Ingredients:
  • 10 pieces Sigarilyas (Wing Beans), sliced thinly
  • 1/2 cup water
  • 2 tablespoons cooking oil
  • 1 pack Mama Sita's Pang Gisa saute mix
  • 3 tomatoes, seeded and diced
  • 3 eggs, beaten

How to Cook:

  • Heat oil in a pan and saute tomatoes and sigarilyas for about one minute.
  • Add water and Mama Sita's Pang Gisa saute mix. Cover the pan and let the vegetable to cook for about 3-4 minutes, or until the vegetables are cooked.
  • Add the eggs. Stir and cook for 2 minutes more. Serve hot.

The recipe was originally printed in Filipino, I just translated it to English for everyone to understand. Anyway, we don't have the saute mix here at home, so I opted to do the traditional way: sauteing minced garlic and onion before adding the sigarilyas and tomatoes. For this recipe, I used about 5 medium sized sigarilyas and just one egg. I actually had a mistake by stirring the dish directly after adding the egg, so the egg didn't form well. To season it, I used salt and pepper.

A very, very simple dish, but I really loved how it turned out.

Best of all, I wasn't able to eat pork... another day of victory for me. :)


Related Posts Plugin for WordPress, Blogger...

Jenn, the Foodie


I come from a family who loves cooking and eating. I never had any formal training in cooking and that I taught myself how to cook based on the handed down recipes, but I could say that I can cook good food. In 2008, I started documenting my food trips for my travel blog, and since I have quite enough to start a food blog, might as well put all those food trips in one location. Thus, a food blog is born - thanks to the new Friendster Blogs. However, due to several problems, I was left with no choice but to pack bags again and move here instead. Here's the permanent address, promise! Enough talk, let the food trippin' begin! {Know More About Me}